Blog
Christmas Crochets – Poinsettia
What is a Poinsettia
The Poinsettia, also know as the Christmas Flower, is native to Mexico. First introduced in the US in 1825, the plant is widely used as a Christmas floral display. The colored bracts—which are most often flaming red but can be orange, pale green, cream, pink, white, or marbled—are often mistaken for flower petals because of their groupings and colors, but are actually leaves. The colors of the bracts are created through photoperiodism, meaning that they require darkness (12 hours at a time for at least five days in a row) to change color. At the same time, the plants require abundant light during the day for the brightest color.
The actual flowers of the poinsettia are unassuming and do not attract pollinators. They are grouped within small yellow structures found in the center of each leaf bunch, and are called cyathia.
What is the association of this beautiful plant to Christmas? Well, the tale has it that a very poor young girl, unable to afford any gift for the celebration of baby Jesus Christ’s birthday, pulled some weeds on the roadside and placed these in the altar, the next day, crimson blossoms sprouted from the weeds and became beautiful poinsettias http://en.wikipedia.org/wiki/Euphorbia_pulcherrima.
Why Crochet Poinsettias
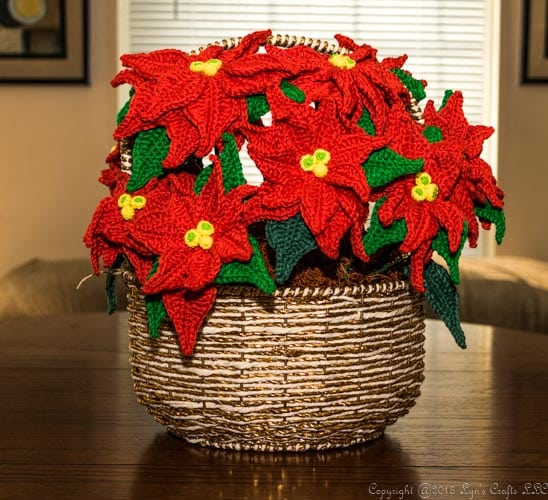
I had 5 large pots of poinsettias that died in the harsh Winter. At the time I really didn’t know how to care for them and they withered and dried. I decided I needed something just as vibrant but a bit more durable. I purchased one more plant to use a my model and set about trying to recreate the various shapes needed to make an enter plant.
Voila! I made poinsettias in redwood red, gold and off white! So perfect in that little corner by the foyer, by the window or atop a shelf!
To make this poinsettia, you will need floral wire, floral tape and wire cutter. Cut 8-10 inches of floral wire 30 gauge ( I suggest the 30 gauge, I used the 26 gauge with my red poinsettias and they were very stiff) and thread it in your tapestry needle. It is soft and will go through the rib of the poinsettia. There are two visible ribs in which you will thread the wire.

So, you have threaded your needle, now start from the bottom of the petal, going to the tip, then bend the wire in order to curve and thread to the other side

Pull the needle through. If you find it difficult, use a pair of small needle nose pliers. Do not pull it hard, just enough tension in order to hide the wire.

I only put wire in 3 or 4 petals/leafs. I like the rest loopy so that they have a natural look. Do the same with the anterior petals. Once done, join petals the together, and then reinforce stem with thicker floral wire. If you are making a potted poinsettia project, you need the stem longer. If you are making a decor, coil the excess wires into ring to serve as a stem for hanging or mounting. If you are making this for applique, no need for wires.

So there, make your poinsettias that wont wither. To maintain the color of your crocheted poinsettias, keep them from too much light and if possible, cover them with dark color plastic bags.

If you want the fully illustrated pattern, complete with links to my video tutorials on working with wire, you can purchase the pattern here.


